0

Geometric or Organic?

Over the past two weeks my students have been learning about shape and form. We first discussed the meaning of both of these terms as it relates to art. 

Shape: A two-dimensional area with a defined boundary. A shape has a height and width. 


Organic Shape: An irregular and usually curvy. Typically shapes found in nature or shapes we make up with our imagination. 


Organic shapes can be tricky when I introduce the concept that they are found in nature because students think of the symbol and not the actual shape.

      
vs   
 

Form: A three-dimensional quality of an object. It has height, width and depth. 


So now I bet you are wondering what projects we created to help us distinguish between 2D/3D and geometric/organic. Let's start with our little bitties...


1st/2nd Slinky Lizards
The younger students were asked to categorize 2D shapes and 3D forms by playing a sorting game on our Smartboard. We discussed how 2D shapes are flat while 3D shapes take up space and volume (see the image above). 


Before telling them about our project I handed them a colored sheet of construction paper and ask them if it was 2D or 3D--and EVERYONE got it right! How amazing is that!?! 


Then I asked how could we make our flat, 2D paper into something 3D. This question took a little more thinking and a little more discussion. Eventually we came to the conclusion that if we folded the paper, it would take on a 3D form! 


 So the students created a design using the shapes we talked about during our lesson and the lines they learned earlier in the year. They then got to practice their cutting and gluing skills by molding their paper into a lizard! Take a look....


Aren't they adorable!? Of course this isn't all of them, but it is all that I have up at the moment. I will try to add a picture of the whole group at a later time. 


3rd/4th Mini Matisse Cutouts
By the time our students reach the 3rd and 4th grade they can distinguish between two-dimensional and three-dimensional shapes. So for this lesson we focused on the differences found in geometric and organic shapes. When thinking about these free-forms my mind immediately went to the artist Henri Matisse. 

Portrait of Henri Matisse 1933 May 20.jpg
(1869 - 1954)

Henri Matisse was an artist who found fame during his life for drawing, painting, sculpting and creating wonderful "drawings with scissors." 


For this project we talked about how we can make organic shapes using our imaginations. If you look carefully at some of Matisse's cutouts you can see the inspiration behind his shapes. Can you see the inspiration? Think organic! 


What do the shapes remind you of? 

  
Foliage! 
Making this connection was by far the highlight from this lesson because it reinforced the idea of organic shapes. From here we discussed that organic can mean "from nature" which is why you might see that word in the produce section of grocery stores. It was almost like you could see the little light bulb's going off in their heads! 

Here are a few more examples by Matisse. 
  

In the last image you can see a dancing figure in the top right corer. The inclusion of figures can be see in several Matisse cutouts. So when it came time for my students to create their mini-Matisse artworks, the first thing they did (after writing their name on the back of course) was add a figure cut out. From there they cut out free-flowing organic shapes. Here is their finished artworks! 

 Here is the full installation! Doesn't it look great against our purple walls?

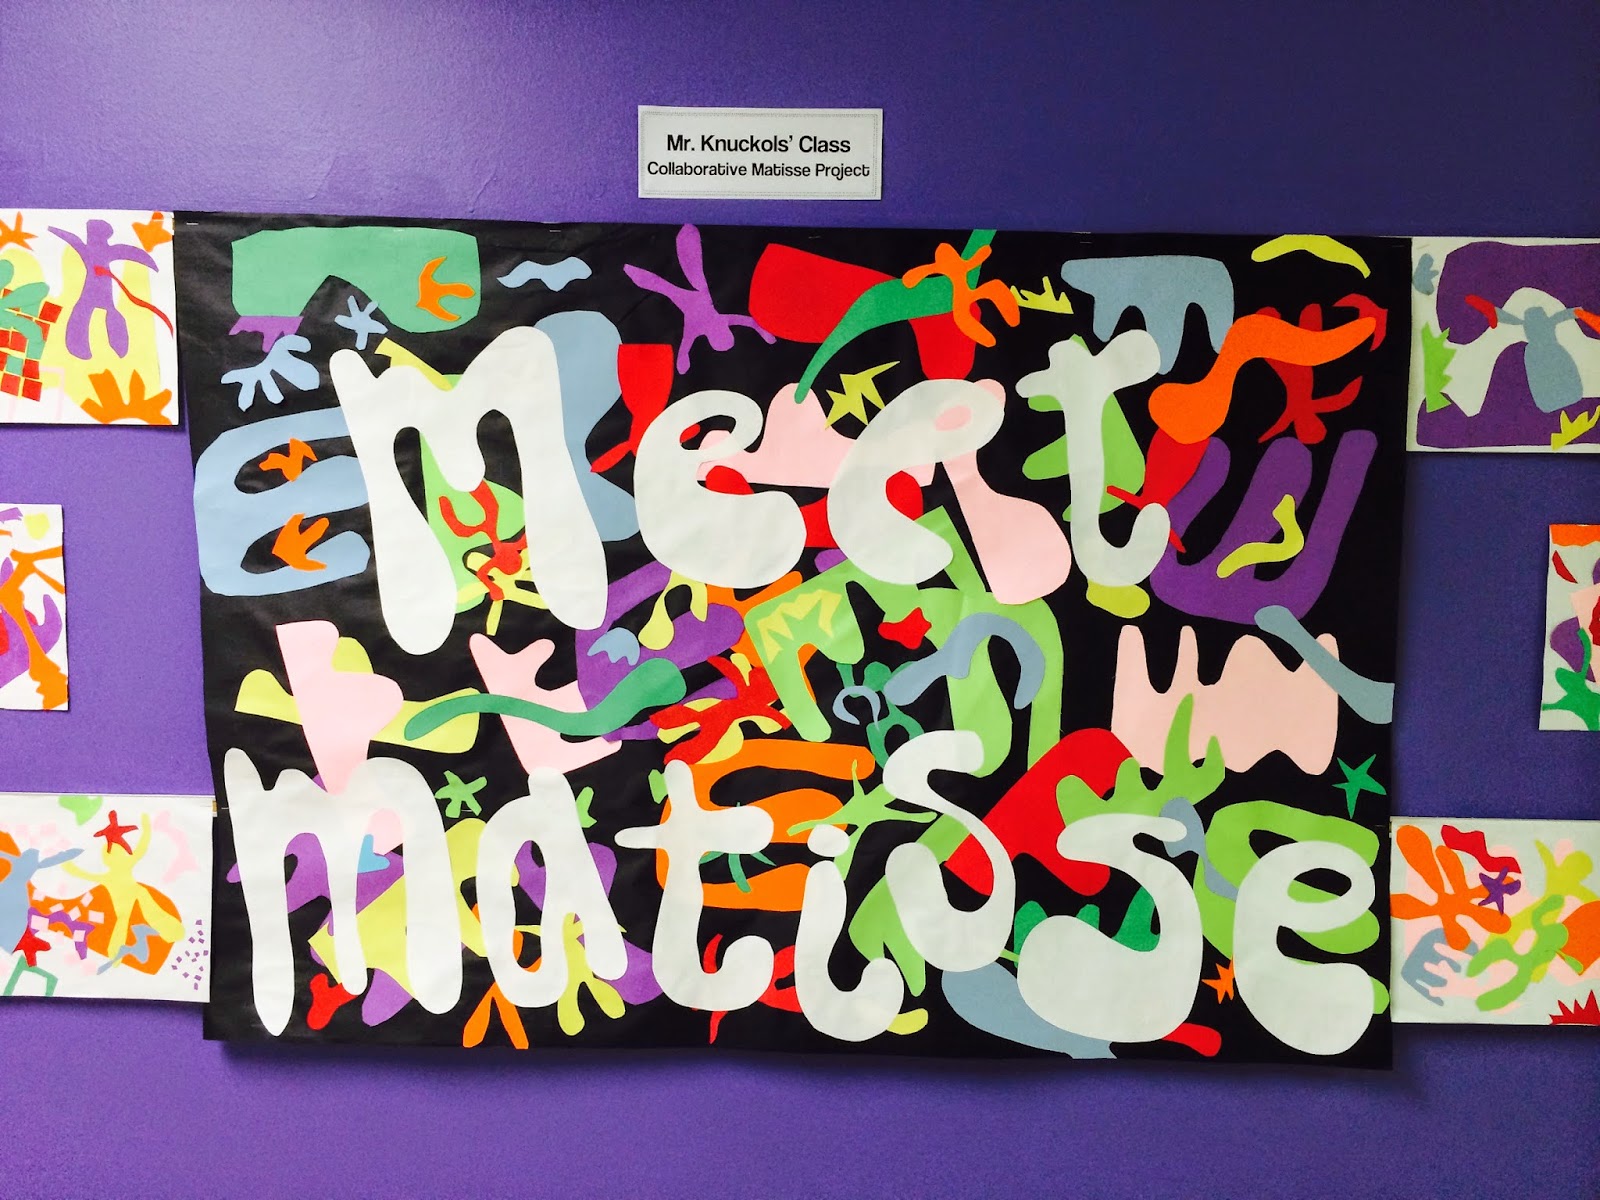
The Matisse banner was made by one of our 4th grade classes. They only had one class period to work on it but they really rose to the occasion. Y'all did a wonderful job!

Here is a sampling of the well-crafted works by our two other 4th grade classes. They worked really hard to master their skills with scissors and glue. Their compositions definitely reflect their attention to details too! 

Last but not least, here are a few works by our 3rd graders. They worked really hard to accomplish so much in this one project. Day by day their skill level is rising and their creativity is growing! 

Up next : Alberto Giacometti Sculptures


0

"I never met a color I didn't like."//Chihuly in the Classroom

After our return from winter break, I introduced the artist Dale Chihuly to my students. A few of my students saw an exhibition of his glass work at the Clinton Presidential Center so I thought I would share his work with everyone! 

To introduce the art of glass work and Dale Chihuly, my students watched the following YouTube videos. I have found that hearing about the art directly from the artist intrigues the students more than listening to their ole art teacher. Feel free to watch!


These videos inspired a great discussion in each class with questions ranging from his eye patch to how can fire and sand make glass. It was very cool to see how each grade level interpreted each video. 


Now onto our projects!

1st/2nd Grade
Our little bitties made Chihuly inspired "macchias." Macchia means "spotted" in Italian! Although you can find decorative and artistic glass work in several countries, it originated from Murano, Italy...hence the Italian term. Cool, right!? 

Here is an example of his macchias...

Can you find the spots? 

Here is an example of his work displayed in a similar fashion as our students' finished artworks...

For our little macchias we used:

  • Coffee filters
  • Markers
  • Spray starch
  • Paint bottles (to form the macchia)
  • Rubber bands (to secure the macchia to the paint bottle)
Our process?
  1. Create a "macchia" inspired design using your markers to decorate the coffee filter
  2. The design must include a colored rim and spots.
  3. Rubber band the center of the macchia to the paint bottle like so...
(Our second graders modeling this step.)

Then they sprayed them with spray starch and voila! 
       
Aren't they beautiful!?

3rd-5th
Our older students worked together to create a classroom "chandelier." This collaborative project required them to create a design on a transparency using sharpies. The 3rd and 4th graders used a spiral shape to create their artwork while the 5th graders were charged with designing their own organic shape. 

Each student had to include color, line, pattern to show movement

Here is an example of Chihuly's chandeliers...

...and here is our students' work! 

Each class has their own chandelier! (Sorry the picture is do dark..the lighting is off.)


This was a wonderful project that I will definitely keep on file for another year! Thanks for stopping by!

Up next: Henri Matisse


0

Off the Cart >> Into the Classroom

The title says it all, right? I am so thrilled and excited to be on this new adventure! I am now teaching at the only gifted and talented school in my hometown. There are so many wonderful changes and adaptations that it keeps the school, the students and the teachers all wide-eyed with excitement!


Before we jump into our curriculum and projects, I thought I would show you our classroom! It is bright and colorful...and of course, organized in color wheel formation! Without further adieu...welcome to our ART ROOM!


Our room is set up with the students' success in mind! Our table are in color wheel order: red, orange, yellow, blue, green and purple. You can see that each table has a cart which stores their tables' art materials for their projects. In the back you can see our "Google board" where I 'post' questions to the students. At the end of their lesson, the students write their answer to the question and 'post it' on post-its (clever right!?) to the Google board. 


I have waited SO LONG to have this little area! Remember our books that we recieved from our Donors Choose project!? Well now I have an easily accessible place to store them so students can read them any time they want! In our "Creative Corner" we also have mini-challenges that students can complete if they finish their project early. They can practice their glue, scissors, coloring and sculpting skills. Eventually I will expand this area, but for now, it serves its' purpose! 

There is definetly more to show--but I'll save that for another day! Thanks for stopping by!


0

It's A KETCHUP Day: Part 1

WOW, OH WOW! Last month was so jammed packed that I completely neglected the blog. Don't you fret though, I'll catch you up. I signed on to this super neat website called


to see what it was all about. Boy, did I see. This site is for teachers who need funds for certain projects. I posted a rather large order for books I wanted to use in our classroom and guess what...THE FUNDS CAME IN! Thanks to a few very gracious donors, we were able to get 20 books to start an art library. These books spark the children's imaginations as well as my own when it comes time to think up a new project. So here is my loot (plus a few of what I already owned)!
 
A few of my favorite titles!


My next upload will highlight a very special project based off of one of my new books. Here's a hint: it will be very INsightful! :)
0

Texture Hands!

Hey, hey! So last week we covered TEXTURE from the Elements of Art. We talked about what texture is (the surface quality of an object/subject) and how can we feel or see it. We also learned that there are two types of texture: actual and implied. For my little ones, K-2, we only covered actual texture...that is texture we can actually feel. We listed off a few adjectives like hard, soft, scratchy, bumpy, fluffy, ect. But we couldn't quite get to our project until I asked them what do we use to feel texture...."OUR HANDS!" And boom, there was our project: Texture Hands.


Aren't these adorable! This was one of my 1st grade classes. We practiced our writing and identifying different textures all in the same project! They were given five different textures. After each sample we touched and felt we used our "describing words" to tell what it felt like. It didn't take too long for them to catch on and pinpoint the word I was looking for! So our first texture was felt, as in the fabric, and our adjective was soft. We then glued our texture to the top of our thumb, because that's where our "feeler" is located. After the glue we look our crayon and wrote "soft" at the base of the finger. We followed that process for laminating film/smooth, bubble wrap/bumpy, sand paper/rough, and aluminum foil/hard (like metal).  I think the project really got them to understand what texture is and how we can identify it! Here is another class example from another 1st grade class...


For my big kids, 3rd-5th, I wanted to keep the same idea of the texture hand but I knew I needed something more challenging...something that pertained to the other type of texture: Implied. Implied texture is something we can see in an art work (two-dimensional) but cannot feel. It simply looks like a texture we know. One of my favorite examples of this is in a work titled Countess d'Haussonville by Jean Auguste Dominique Ingres from 1845.


In this painting we talked about her dress. What is it made out of? What do you think it feels like? How does it look when the light is cast on it? By looking at the folds of her dress, do you think it is light weight or heavy? How do we know? We just went on and on and on. By the end of our discussion we found out that is it made of a shiny silk or taffeta, probably light weight because the folds are small, and it would feel smooth and soft. This my readers, teachers and students is implied texture. The artist, Ingres, was very skilled at depicting fabrics so realistic that we would be able to "feel" them ourselves. So from this we learned that implied texture is something we can see in a picture and feel in our minds but not feel with our hands. So our assignment was also a texture hand, but they were not given actual textures. We talked about a few more textures, like the ones listed above, and then the fun began. They had to come up with a texture, think about what object has that texture, and draw it as one of their fingers. Confused? So were they, so we did this as a class for my 3rd graders. Sorry 4th and 5th, this project was individual (we brainstormed together, like what would be hard: bricks, desks, books, ect...but they had to draw it by themselves). So here is a 3rd grade example....


I LOVED this one for several reasons, but my primary reason has GOT to be the example they gave for "smooth." It is a ticket! The 3rd grade behavior management system is run on tickets. They get them for good behavior, following directions, ect. It is safe to say that these kids L-O-V-E their tickets. So I thought it was pretty cleaver that this little girl thought to draw a ticket as her "smooth finger." Got to love it. 

Unfortunately, I was not on my picture-taking-game last week so this was the only example I got around to photographing. But all the kids did a great job, especially my older ones. I know that implied texture is a little hard to wrap your head around, but they nailed it. Great job guys!

Stay tuned for next week, I will be posting it soon. Here's a hint as to what we learned: don't underestimate what a Paleo could do...or a Kindergartner! 
0

Principles of Design: Patterned Portfolios

I promised more pictures and this week I believe I have fulfilled that promise! Before we get to the AMAZING artwork my students produced this week, lets talk about what we learned. We got off the "Elements of Art Bus" and hopped onto the "Principles of Design Bus."

This week we learned about. . .

Don't you just love those pattern cards!? I think it really helped my students understand that you can make patterns out of the elements we have been learning about: shapes, lines and color (I didn't use color in my examples because my 3rd graders could use my examples. It isn't until the 4th grade that we ask them to create their own. But of course I want to see my students' creativity, so they had to choose the colors to make my patterns come alive!) So we took our portfolios that we started last week (Their assignment was to write their name, "art portfolio," use the all the colors on the color wheel and incorporate the lines we learned from the previous week. I know, it was a heavy assignment but you can see that they rose to the challenge!)...


                        (Teacher example)

                                                             (2nd grade example...look at all the different types of lines!)

(4th grade example...LOVE the lines and symmetry!)
(5th grade example of a student who changed schools last week. I added this in because she nailed this assignment! She combined the color wheel AND ALL the lines we learned to make the front of her portfolio. SHE ROCKED IT!)

After they created the front of their portfolios, they had to flip it over and create patterns on the back. They could use any colors, but you'll see that one student kept the color wheel theme. Isn't that awesome!?

 
                                      (4th grade example)

                                                               (Remember the previous 2nd grade example? This is the back!)

(This precious example comes from a 1st grader. You can see that she combined the lines we learned last week with the shapes we learned from the first week of school to make her lines of pattern. She is so talented!)

So we had a VERY busy, productive and creative two weeks of school! I am one week behind schedule on posting, so I will try my very hardest to post last weeks project on texture ASAP! A huge thanks to my students for their patience this week on getting this up. You guys are awesome, keep it up! :) 


0

Project: Portfolio!

I wish I could say this post will be riddled with fabulously beautiful pictures, but alas, it won't be. I somehow made it to Friday without taking a single picture. Woops! I can promise I will be a better picture taker this week :)

Last week we started making our portfolios! The portfolio (or "art pocket" as my young ones call it) is made out of poster board...perfect for coloring, picture making and doodling! We only drew on one side this week because we were saving the other side for this week! Two in one project, gotta love it! On the first side the students (1st-5th) had to write their name and art portfolio using all the colors we have been talking about....


Then they had to incorporate line and shape! They could have done this in their letters or in their drawing. Here are some of the lines we learned!


After they wrote out their names and "art portfolio" I asked them to draw pictures. ANY pictures. It is no surprise that I haven't memorized all of their names, even though I have been trying my absolute hardest! 460 students...that's a lot of names! So because I am a visual learner, I asked them to draw anything they like. Think of this like a free assignment. The kids loved it! I will definitely be instructing more free drawing in the future. It is so amazing to see how their minds work and what their creativity comes up with! 

This week, as I said, we are doing the backs of their portfolio. We are now getting into the Principles of Design with Pattern, so stay tuned!!


Back to Top